Using the Peloton APP without the Peloton bike. It’s been just over 12 months since I started using the Peloton App with my own bike and I thought it was time to share an update to my original review. This post includes my interview with ABC News New York.
I am happy to report that with the Peloton App and my wonderful Sunny bike I have now lost 22 pounds, am fitter than I have been in years and am in a much better mood (according to my family)! The variety of Peloton spin classes is awesome, the instructors are great and all the other options the Peloton app has added over the past year like weight training, boot camp, ab workouts, meditation and yoga are simply amazing. I even think the production value is great compared to some classes I have tried on YouTube. Overall, super psyched that I “converted’ my Sunny bike into a Peloton.
If you are a first time visitor, my comprehensive review and step-by-step guide to my Peloton App alternative can be found in my original “Peloton for Less” blog post. It chronicles how I pined for a Peloton bike but after seeing the price tag how I MacGyvered (yes, that is a word) an alternative with my Sunny 1509, some Wahoo sensors, and other bits & bobs that make my method not only an absolute money saver but also turns me into a sweaty mess. This post is a scaled down summary of what has worked, what hasn’t and how everything is holding up after 12 months.
Have a I used the Peloton App every day for 12 months straight? Heck no! Life gets in the way (like sick children, work or deciding to stay in bed instead of working out). It was great during a pandemic though! There have even been stretches where I simply haven’t worked out for no reason in particular. When there has been a lull in my routine I am happy that I am only spending $12.99 on the app (UPDATE: now $24.99) and didn’t take the plunge and go all in with the expense of the actual bike and an additional $40 monthly subscription. I can’t imagine the guilt!
My Year in Review – Using the Peloton App without the Peloton Bike
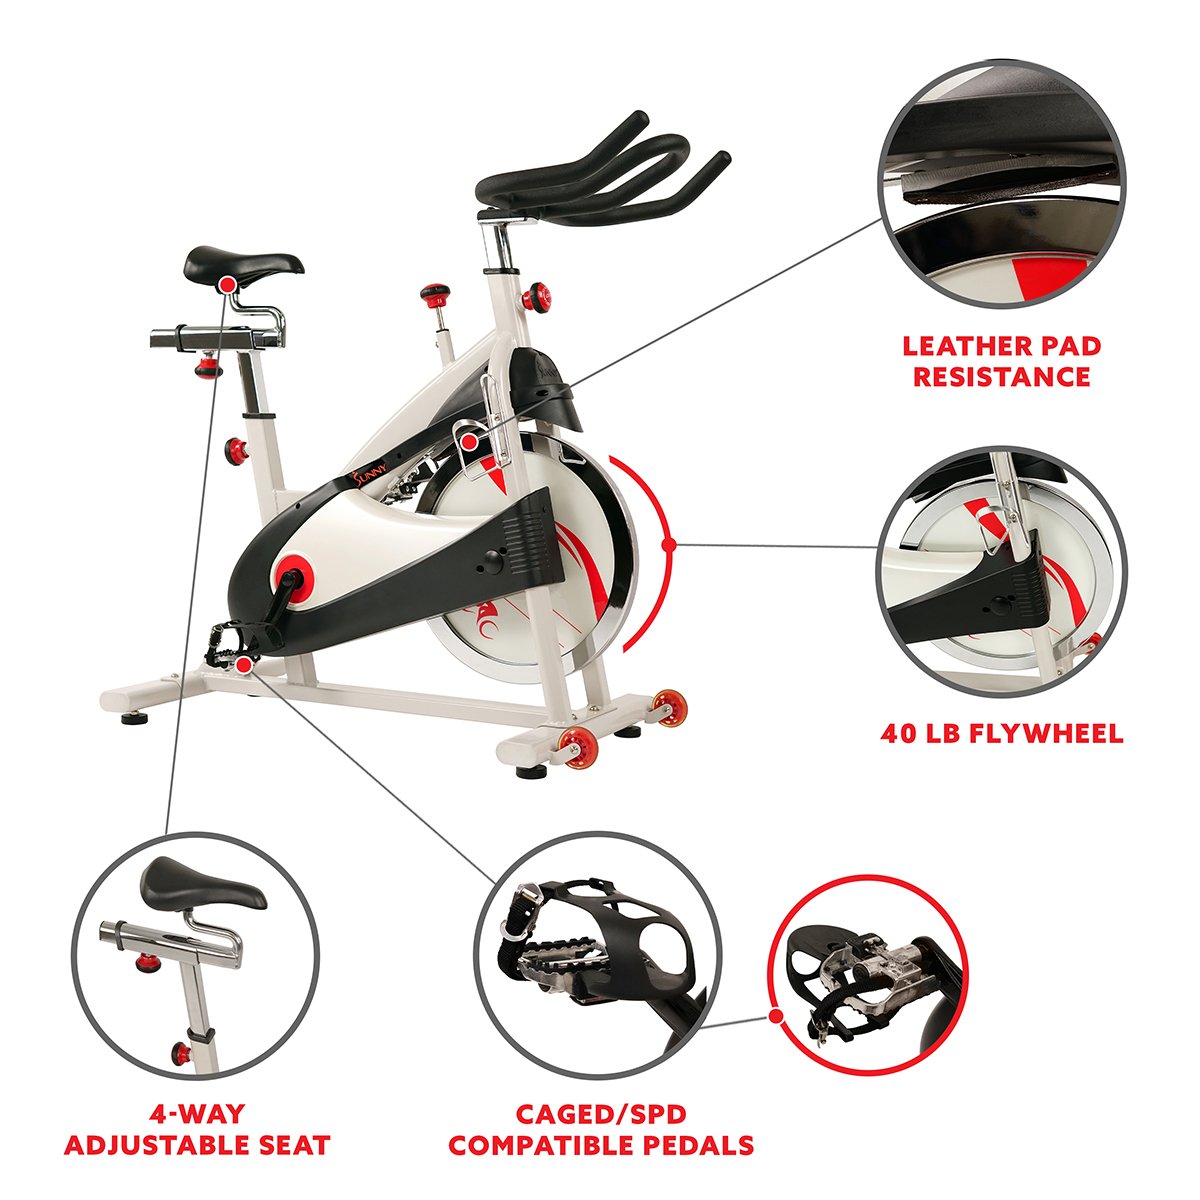
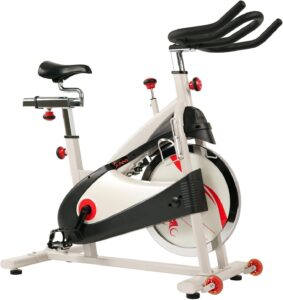
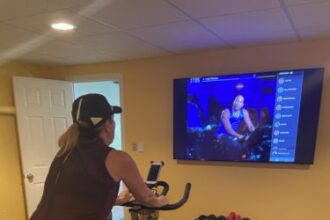
Step 1. My Spin Bike – The Sunny Bike.
A year in and this bike is good as the day it was delivered. There are LOADS of at-home bikes on the market at various price points but for my purposes, this one can’t be beat. I did my research and this was the one (plus it was relatively inexpensive alternative all things considered). I assembled it myself but depending on your situation you may want to consider using Amazon Home Services to have it brought into the house and assembled.
Here is a quick video of me on my bike (with some audio in case you are wondering where the noise is coming from).
Step 2. The Peloton App.
When I first started with the app there was about 3,500 spin classes. Now there are over 10,000 classes to choose from on-demand and it is also available in the UK and Canada. At $12.99 (now $24.99), it is less expensive than the $39 monthly subscription required if you buy the actual Peloton bike.
Spin classes can be selected by length, type (e.g., Low Impact, Intervals, Live DJ), music genre (e.g., Pop, Country, Hip Hop, Broadway, Y2K) and instructor. The classes are all very well done. I’ve tried all the instructors and my favorite is still Emma Lovewell. I stream the classes to my TV from my iPad via Apple TV but you could also just buy yourself a tablet holder and attach your iPad to your handlebars. Alternatively, you could purchase a bike that already has a tablet holder attached like this new Sunny 1805.
In addition to spinning, the app now lets you access classes like yoga, strength training, HiiT and classes for the Peloton treadmill like boot camp classes, running and walking. I like to take short strength training and abs classes (10 minutes or so) after a bike ride. Peloton now also has a rowing machine.
When I am taking any Peloton class that has me off the bike and on the mat (like yoga), I like to switch to watching directly on my iPad. Much easier to follow along with a downward facing dog when the screen is near eye level. And if you think about it, the portability is another bonus over having the monitor bolted to the actual bike.
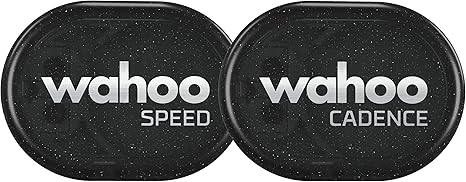
Step 3. Wahoo Speed & Cadence Sensor
I attached both the cadence and speed sensors to my Sunny bike. See my full post for photos. The cadence sensor is a must to follow along with the cadence instruction. For example, an instructor will tell you to keep your cadence anywhere between 45-60 while going up a hill. The speed sensor belongs more in the “nice to have” category but is not essential unless you want to measure distance. You can purchase the cadence sensor separately.
Step 4. Wahoo Fitness App
This is a great free app. It wirelessly connects to, and displays, my cadence, speed, heart rate, calories burned, workout distance and workout time. Here is what the Wahoo app, cadence and speed sensors look like:
You can If you are using just a tablet to view the classes without streaming to a TV, a recent upgrade to the app allows you to display your cadence and heart rate on the tablet (using your Wahoo heart rate monitor and Wahoo cadence sensor) instead of to the Wahoo app. This is super cool, however, if you are streaming from the tablet to a TV like me the cadence and heart rate do not display on the TV. So, long story short, the upgrade doesn’t change my set up.
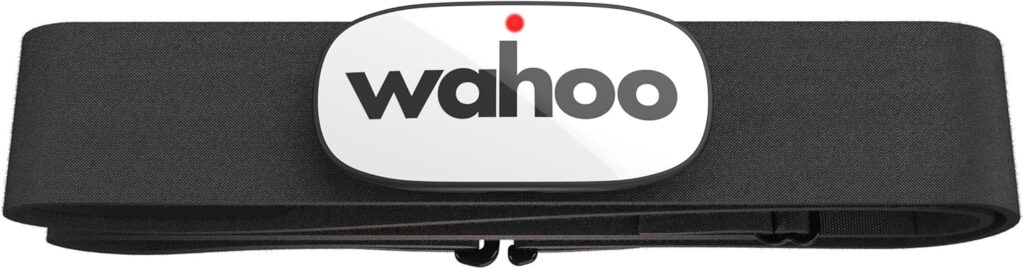
Step 5. Wahoo Heart Rate Monitor
I use the monitor to track calories burned during a workout. It works seamlessly with the app.
Step 6. Max Miles Phone Holder.
I use this phone holder so that I can see my Wahoo app and my cadence, speed, etc. I connect it to the handlebars but with a recent update, you may no longer need a phone holder. If you take the classes on your tablet, mirror to your TV or connect your device to the TV with an Apple Lighting Adapter + AV connectors or an Amazon Firestick, your cadence, HR, class time and the screen names of others take the class at the same time show right up right up on your screen. If you stream classes via AppleTV like me, you still need it because when you stream, the TV doesn’t show all of those stats.
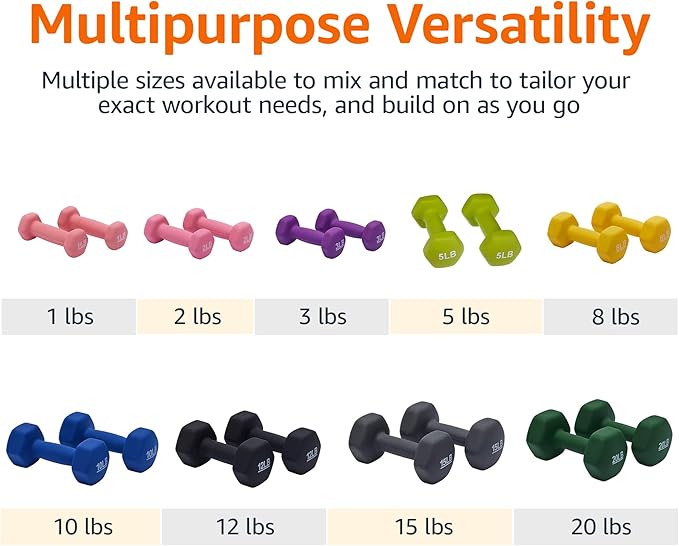
Step 7. Dumbbells.
Get yourself some inexpensive weights for the arm routines during the spin classes and the other boot camp style classes.
Step 8. Extras.
Seat Cushion. My bum hurt. End of story…
Cart. I needed somewhere to put my dumbbells and towel.
Disinfectant Wipes. Trust me. It all starts to have an odor after a while unless you keep the bike clean.
Audio Books. Shhhh….sometimes I select “scenic ride” and listen to an audio-book when I feel like taking it a bit easy.
Disco Ball. I bought a small disco ball and its been a game changer. The lights keep the beat with the music.
My 15 Minutes of Fame with ABC News
A few months into my journey I was interviewed by the ABC News New York “7 on Your Side Team” about my inexpensive Peloton App alternative (which they called my “Peloton hack”). I had never been interviewed before and was super nervous. I think we spoke for 45 minutes and I am on the air for about 30 seconds. Here is a link about the interview: Peloton App Review; Cheaper Options Exist for Taking the Peloton Plunge
The Peloton App is Fantastic
In summary, it’s been over a year and I am extremely pleased with my set-up. The Peloton app is awesome, my bike is great, I have saved a ton of money while losing weight. I have zero regrets about using the app and it is an unbelievable rich resource of workouts and such a value for the money. What could be better?
As long as you vary your classes so as to not plateau and you choose healthy foods, you will drop it like it’s hot. 🙂
Drop me a note if you have any questions!
Happy Spinning!
Disclaimer: As an Amazon Associate, FitnessGeek.ai earns from qualifying purchases. This means we may earn a small commission when you buy through links on this page — at no extra cost to you. Thank you for supporting our content!
UPDATE: I created an update to the post “How to Access Peloton App Classes from your Phone, Tablet, TV or Computer” – this is great because you can take advantage of all of the non-bike classes on the Peloton APP as well!


